Scale drawings show an image either reduced or enlarged in size. The change between the original and the scaled drawing is generally represented by two numbers separated by a colon, like 10:1 (read as “ten to one”). The difference between the ratio numbers represents the factor by which the scaled image is enlarged or reduced. So for a 10:1 scale ratio, a 1 inch (2.5 cm) drawing will be 10 inches (25 cm) in real life.
Method 1 of 2:
Adjusting Image Size by Hand

Method 1 of 2:

1
Measure the object you’ll be scaling. For images that are irregularly shaped, measuring with a ruler or tape measure can be difficult. In these cases, outline the perimeter with a piece of string, then measure the length of the string to find the perimeter.
- For rough scaling of simple 2-D objects, you can probably get by with only measuring the width and height of the object.[1]
- It’ll be helpful when you start drawing the scaled image if the perimeter is broken up into segments, like the top, bottom, and sides.[2]
- You may be able to break up the perimeter into small, regular shapes, like squares and triangles. These segments can be added together to find the perimeter.

- 2Choose a ratio for your scaled drawing. Common ratios include 1:10, 1:100, 2:1, and 4:1. When the first number is smaller than the second, it represents scaling down (reducing). When the first is larger than the second, it represents scaling up (enlarging).
- When scaling down images that are especially large, expect the second number in the ratio to also be large. A 1:5000 ratio might be used to fit a building-sized object on a single sheet of paper.
- Enlarge small images by increasing the first number of your ratio in small increments. A 2:1 ratio will be double the size of the original, a 4:1 ratio will be quadruple, and so on.

- 3Convert the actual measurements with the ratio
- When scaling down, divide the original measurements by the second number in your ratio. When scaling up, multiply the original measurements the first number.
- Some ratios may be irregular, like 5:7. All this means is that for every 5 units of distance in the scaled drawing, you’ll have 7 units of distance in the original.[3]
- For example, if scaling down with a 1:2 ratio, a length of 4 inches (10 cm) would become 2 inches (5.1 cm) because 4 ÷ 2 = 2.
- When scaling up with a 2:1 ratio, a length of 4 inches (10 cm) would become 8 inches (20 cm) because 4 x 2 = 8.

4Start drawing the perimeter with a straight segment when possible.


A straight segment will be easier to check against your converted length. This will also give you a better feel for how much the scaled image has changed from the original
- If your drawing doesn't have a suitable straight segment, one that is mostly straight might work just as well.
- If your image is highly irregular, try drawing the perimeter from the top down or bottom up.


5
Refer to the original drawing frequently.
Branch out from your starting segment by adding to the sides in the same fashion as the original. Continue adding to the perimeter until the entire scaled image is drawn.
- Check your converted measurements against the drawn lines of your scaled image as you go along. Erase and adjust lengths as necessary.


6
Use a piece of string to check the scaled lengths of irregular images.
Cut a piece of string slightly longer than your longest scaled segment. When drawing irregular or arced segments, overlay the string on the segment then measure the string to see if it matches up with the scaled length.


7
Add details after finishing the perimeter. The lines inside the perimeter of your drawing will be similarly scaled. However, once the perimeter is finished, you should have a much easier time drawing the scaled inside lines freehand.
- When you finish drawing, check to make sure that all lines of the drawn image match your converted scaled measurements.
Method 2 of 2:
Changing Scale Digitally
Method 2 of 2:
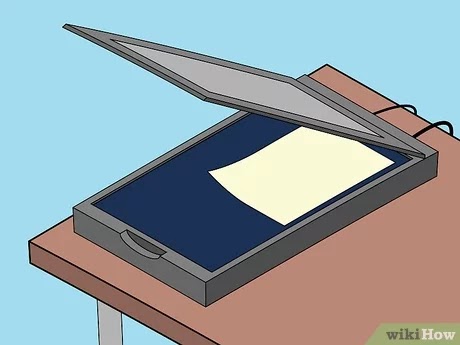
1
Scan the image or snap a pic of it with your phone. If your drawing isn't already digital, you'll need it to be before you start scaling. Scanning often has better quality, but a phone picture taken with good lighting should do the trick if you don't have a scanner.


2
Insert the image into a suitable program or app. Many programs, like MS Word, MS Paint, Photoshop, Apple Paintbrush, and Apple Pages, allow you to adjust the scale of a picture digitally. Copy and paste the image into your chosen program.
- For the highest quality and most accurate scaling, prioritize using a design program, like Photoshop or GIMP.


3
Navigate to the image layout options. This can usually be done by right clicking the image. In the drop-down menu that appears, find and click “Size and Position.” In the resulting menu, select “Lock aspect ratio” and “Relative to original image size.”
- Some programs may use different wording for these options. Feel free to play with settings in the “Size” menu to see how changes affect the image.
- If you have difficulty finding “Size and Position” try looking for scaling options in the properties of the image or in an image formatting menu.


4
Adjust the height and width under the “Scale” heading
Many programs represent the digital image size as a percentage. 100% indicates that the digital image is the same as the original, whereas 25% means the digital is a quarter the size of the original.
When the percentage exceeds 100%, the image will become enlarged. Enlarging images may sometimes cause graininess or pixelation, especially with low-resolution images.


5
Save the scaled image and you’re done. After the image has been scaled, save a copy of the image or replace the original with the scaled one. If you need a physical copy of your scaled image, print it and you’re all set.
Comments
Post a Comment
Comment here.....